What Is a Ferrule Crimping Tool Used For?
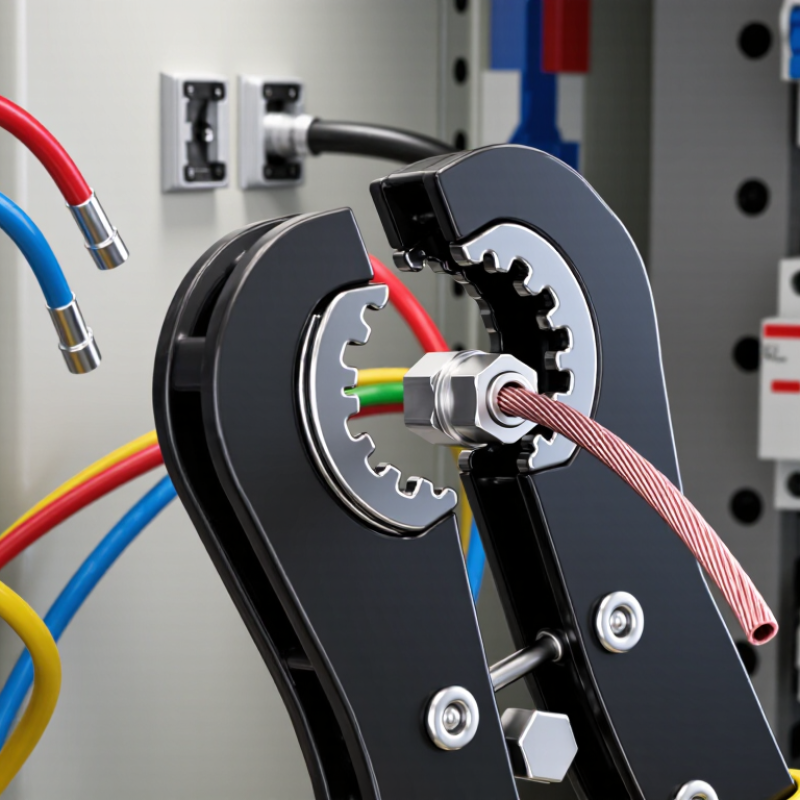
A Ferrule Crimping Tool is used to compress a metal ferrule around stranded wire. It creates a secure, compact termination for terminal blocks, circuit breakers, control cabinets, and industrial connectors. The tool also prevents loose strands from spreading under a screw clamp. That small detail matters.
Grand View Research reports that the global electrical connectors market continues to expand, supported by automation, electric vehicles, renewable energy, and factory digitization. MarketsandMarkets similarly identifies industrial automation and transportation as major demand areas for reliable electrical connections. These reports do not measure ferrule tools alone, but they show the larger need for consistent wire termination. A ferrule crimping tool fits directly into that need.
Electrical engineer and crimping specialist Dan C. McCarthy describes the practical goal clearly: “A crimp must hold the conductor securely and maintain electrical continuity.” The wording sounds simple. The work is not.
A proper tool uses the correct ferrule size, conductor range, and crimp profile. An undersized ferrule can damage strands. An oversized ferrule may pull free. The handle should close fully, and the finished ferrule should show even compression around the conductor. In a cabinet, that means cleaner wiring, faster inspection, and fewer unreliable connections.
Still, a tool cannot correct every mistake. Poor stripping, mixed wire sizes, or weak ferrule material can undermine the result. This is where many explanations become too confident. Good practice requires manufacturer instructions, suitable test methods, and regular tool inspection. The Ferrule Crimping Tool is valuable, but disciplined preparation makes its value visible.
Ferrule Crimping Tools: Purpose and Role in Terminating Stranded Wires
What Is a Ferrule Crimping Tool Used For?
Ferrule crimping tools terminate stranded wires with a metal sleeve called a ferrule. The sleeve gathers loose copper strands into one compact end. This end fits securely into screw terminals, spring terminals, and some push-in connectors. Without a ferrule, strands can spread, break, or slip from the clamp. That can create an unstable electrical connection.
The tool applies controlled pressure around the ferrule and wire. Its shaped die creates a firm, even crimp without crushing the conductor. Select the ferrule size according to the wire’s cross-sectional area. A sleeve that is too large may pull away. One that is too small can damage strands. Strip only the required insulation length. Exposed copper should remain inside the ferrule barrel.
Good termination requires more than squeezing the handles. Insert the stripped wire fully, then check that no strands extend beyond the sleeve. A light pull test can reveal a weak crimp. The terminal should also sit straight, with insulation close to the ferrule entrance.
I have found that rushed stripping often causes hidden problems. The crimp may look clean but still hold poorly. Rechecking the die setting is worthwhile, especially when changing wire sizes. A ratcheting tool can improve consistency, but it cannot correct an incorrectly selected ferrule. Clean preparation still matters.
Ferrule Sizes from 0.14 to 50 mm² for Different Conductor Cross-Sections
A ferrule crimping tool secures a wire’s fine copper strands inside a metal ferrule. The ferrule creates a firm, compact end for terminal blocks, circuit breakers, and control cabinets. Ferrules from 0.14 to 50 mm² suit different conductor cross-sections. The correct size should fit the stripped conductor without forcing or leaving loose strands.
Small ferrules, such as 0.14, 0.25, or 0.5 mm², are useful for signal wires and compact control circuits. Medium sizes, including 1.5, 2.5, and 6 mm², commonly serve power and distribution wiring. Larger ferrules up to 50 mm² support thick conductors used in high-current equipment. A suitable tool must cover the required range and produce an even crimp. Uneven pressure can deform the sleeve or damage the conductor.
Tips: Check the conductor area before selecting the ferrule. Strip only the required length. Insert every strand fully into the sleeve. After crimping, pull the wire gently by hand. It should not slide out. In practical work, color coding helps, but it is not enough. Ferrule colors can vary between standards and suppliers. I have seen correct-looking crimps fail because the sleeve was oversized. Measure, inspect, and test the connection. A small mistake matters.
How the Tool Compresses Ferrules Under DIN 46228 Requirements
What Is a Ferrule Crimping Tool Used For?
A ferrule crimping tool compresses a metal ferrule around stranded wire. This creates a controlled termination for screw, spring, and clamp terminals. Under DIN 46228, the ferrule must match the conductor cross-section and ferrule design. The crimp should hold strands firmly without cutting or spreading them.
The tool’s jaws apply pressure around the sleeve. Hexagonal, square, and trapezoidal profiles distribute that pressure differently. A ratcheting mechanism can prevent release before the full crimp cycle finishes. That feature helps reduce loose connections, but it cannot correct an incorrect ferrule size. Wire stripping also matters. Damaged strands may reduce contact quality inside the ferrule.
DIN 46228 describes ferrule dimensions and performance requirements. It does not make every crimping tool automatically compliant. Technicians should verify the tool’s approved conductor range and test sample pull-out strength. The U.S. Bureau of Labor Statistics recorded 145 fatal occupational injuries involving contact with electric current in 2023. That figure is not caused by ferrules alone, but it shows why termination quality deserves attention. A neat crimp can still be wrong. In practical panel work, visual inspection should be followed by a gentle pull test and conductor-length check. This step is simple. It is often skipped. Data from the International Electrotechnical Commission also distinguishes conductor classes in IEC 60228, reminding installers that stranded conductors do not behave identically. The uncomfortable point is clear: standard markings help, but disciplined workmanship decides the final connection.
Crimp Profiles: Square, Hexagonal, and 8-Indent Configurations
A ferrule crimping tool secures a metal ferrule onto the end of stranded wire. The ferrule gathers loose strands into a compact, protected termination. This helps the conductor enter terminal blocks cleanly. It also reduces strand damage during repeated installation or tightening.
Square crimps create four broad faces around the ferrule. They work well in many spring and screw terminals because the shape inserts easily. A square profile often sits steadily inside rectangular terminal openings. Hexagonal crimps form six angled faces and distribute pressure more evenly around the sleeve. They are useful when a balanced, compact compression is needed. However, the best profile depends on the terminal design and ferrule dimensions.
Eight-indent tools press the ferrule at eight separate points. This pattern can produce accurate compression with minimal distortion. It is especially practical where space is limited or consistent conductor retention matters. Select the correct die range, then strip only the required insulation length. The copper strands should reach the ferrule end without extending beyond it. Keep insulation outside the metal barrel.
A clean crimp is not automatically a reliable one. Check for loose strands, cracked insulation, or an uneven sleeve. A gentle pull test can reveal weak compression. I have seen operators focus too much on appearance. The conductor size, ferrule length, and terminal entry matter just as much. Small errors can remain hidden until vibration or maintenance exposes them.
Selecting Ferrule Tools for IEC 60999 and UL 486F-Compliant Connections
A ferrule crimping tool compresses a metal sleeve around stranded wire ends. It prevents strand flare, supports cleaner insertion, and improves clamping consistency. In control cabinets, the finished ferrule should enter the terminal without folded strands or exposed copper.
Selecting the tool requires more than matching the wire size. IEC 60999-1:2019 evaluates clamping units through mechanical and electrical tests, including conductor security and temperature performance. Therefore, choose a die designed for the ferrule profile and conductor cross-section. A hex crimp may suit some terminals, while a square crimp may provide better insertion in others. Check the terminal manufacturer’s specified crimp geometry.
For connections evaluated under UL 486F, verify the ferrule, conductor, terminal, and crimp process as one system. A tool alone does not create compliance. The IEA Electricity 2024 report forecasts global electricity demand to grow by about 3.2% annually from 2024 through 2026. More energized equipment means more repeated terminations in compact panels. Small process errors matter.
Inspect the finished crimp under good lighting. The sleeve should grip firmly, with no cracked metal or loose strands. Use a calibrated pull-test method when required. I have found that “tight enough” is not a reliable measurement. It sounds practical, but it hides variation. Even experienced installers can overlook an incorrect die setting. Record the wire size, ferrule type, tool condition, and inspection result for traceability.
What Is a Ferrule Crimping Tool Used For?
A ferrule crimping tool compresses a wire-end ferrule around stranded conductors to create a secure, organized termination for compatible screw-clamp and spring-clamp terminals. The chart shows common ferrule conductor sizes and their approximate AWG equivalents. Always verify the ferrule, crimp profile, conductor class, terminal, and tooling requirements against the applicable IEC 60999 and UL 486F requirements.
Select the ferrule and die according to the conductor cross-sectional area, not by appearance alone. The AWG values are approximate equivalents because metric conductor areas do not always match an exact AWG size.



 Distributors
 SDS Download
 Contact
